
In order to create a graphic symbol it is essential to understand what is a graphic symbol: to put it simply if you have to explain what it is, it is NOT a graphic symbol. The purpose of graphic symbols is to communicate without having to say anything.
First things first: what do I want to make a symbol of? Find a reference (images to draw inspiration from). Please do not copy directly from a photograph that already exists. If you Google "ladybug" and just trace over an image you like- that is not very creative. Furthermore, if you do so and then try to pass it off or sell it as your own that is called copyright infringement. Don't worry, I will have a separate post about copyright law- it's one of my hang-ups....
Now in school I have been taught to always sketch out thumbnails and roughs before doing anything on the computer. But after years of familiarizing myself with Adobe software I tend to doodle and sketch my symbols right on the computer. It's best practice to always have a sketchbook with you to jot ideas down or doodles but its not the end of the world if you like to doodle on the computer.
Ok! You've found a reference.

(©iStockphoto Ladybug On A Leaf)
A ladybug! How sweet. Now what do you do with it?
Take a good look at the ladybug, think about what makes a ladybug a "ladybug", applying these attributes to your symbol will make it successful.
Well it looks like a ladybug has a nice fat round body, the color ranges from a dull orange/brown to bright red, and they always have black spots. How would you like to create your symbol? Do you want to hand-draw it then illustrate it? Have at it! For design purposes I'm going to make my symbol in Adobe Illustrator CS4 (Oh CS5.5 you are on my radar....)
If you are lucky and blessed to have a copy of Illustrator, go ahead and open a new file...
Start by selecting the Ellipse tool under your Shapes tool in the tool bar (select shapes tool and hold down to expand options) and make a perfect circle by holding down "Option + Shift" ("Cntrl + Shift" for PC users). Make the circle as big as you want, this will be the body.

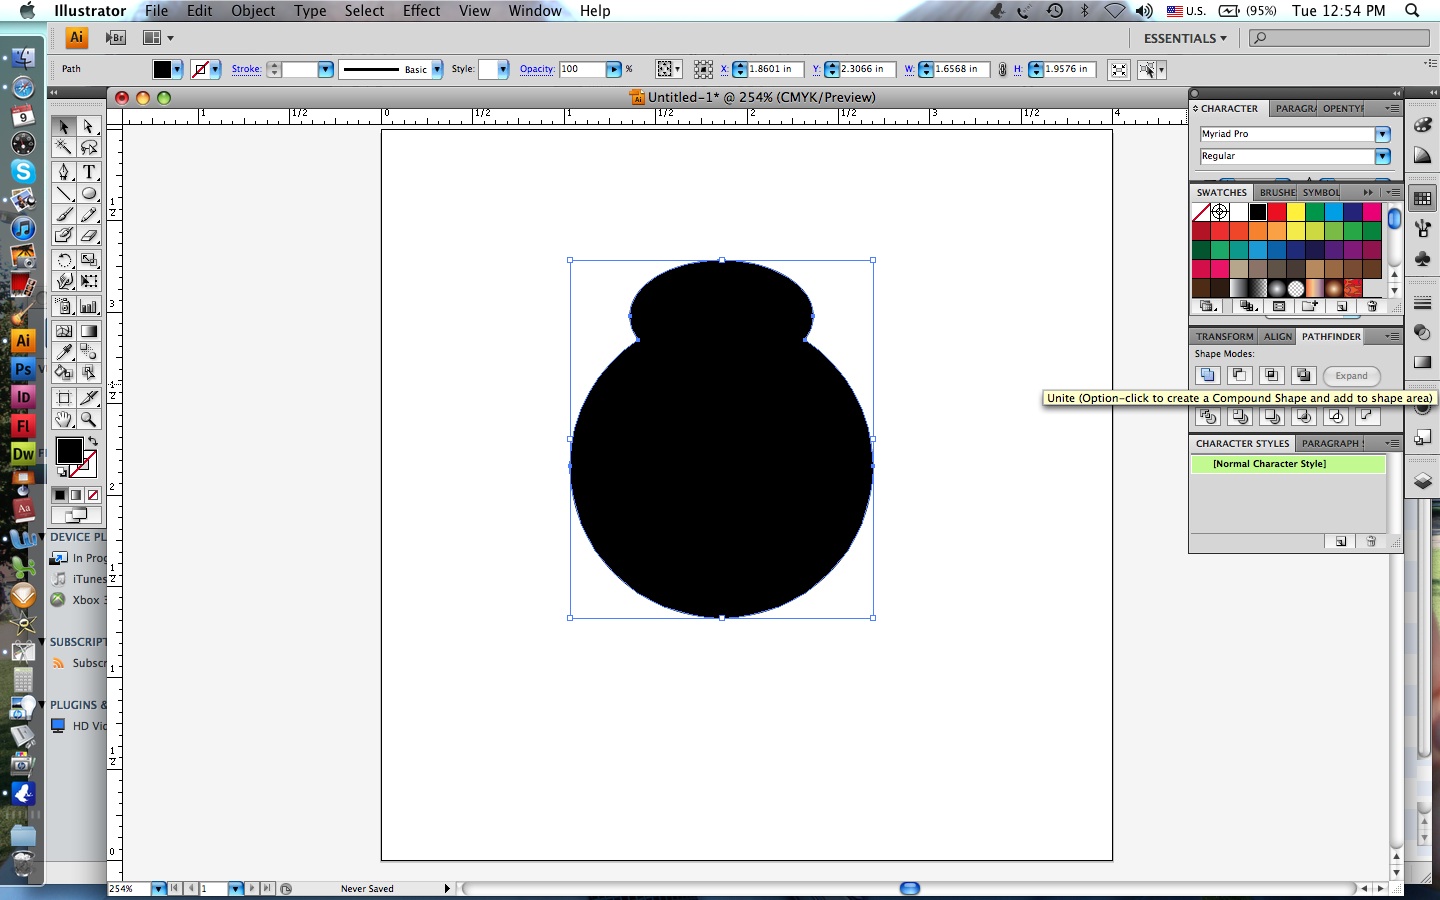
Make an oval, any kind of oval, as big or little as you want. This will be the ladybug's head, so be kind, we want this bug to have some sort of brain. Center the oval and circle using your Horizontal Align Center option in the Align window then bring the oval down to where it overlaps with the circle.

Merge these two shapes into one by using the Pathfinder tool — Shape Modes — Unite.
Create another perfect circle slightly larger than the original circle used for the body, make it a different color than the body so you can distinguish between the two shapes. Align the top of the larger circle with the top of the circle of the body (this larger circle will be the outline of the wings, we will get rid of it later) using Vertical Align Top from the Align window. Choose your Pen tool from the tool bar, make sure some color is selected for the stroke and the fill color is none. To help make things centered I've made a guide line by clicking on the left rule bar and dragging to the center of the circle.
Now I can draw my wings. I make an anchor point at the top of the large circle in the center (right on top of that rule guide) I make another anchor point at the bottom but slightly off center (when making your second anchor point click and hold down while pulling away from the point to make an arc).

When you are satisfied with the curve of your arc let go and click on that anchor point you just made to convert that anchor point (this way when we make another anchor point we can control the arcs). Make your next anchor point on the middle-edge of the large circle and create an arc that follows the curve of the large circle.

Click on that anchor point to convert it, then close your anchor points by clicking on the beginning anchor point, holding it down, making your arc, and letting go. Voila! A completed shape using the Pen tool.

Next we can delete that large circle guide we made by clicking on it with the Select Arrow tool and hitting the delete button. Click on the stroke of the wing shape we just made and change the color- choose a fill color and make the stroke color "none". We need two wings, so you can either copy and paste the wing we just made by selecting the wing and choosing "Copy — Paste" in the Edit tools on the top nav bar, or when clicking on the shape hold down "Option" ("Alt" for PC users) then drag to make a copy.
On the second wing we need to make a mirror reflection of it so its facing the right way. From your Object tool on the top nav bar, choose Transform — Reflect — Vertical.

Align the tops of the two wings using your Vertical Align Top option in the Align window.
Bring the second wing so it slightly overlaps the first wing in the center then merge the shapes into one by using your Pathfinder — Shape Modes — Unite tool once again in the Pathfinder window.

Now lets make some dots for the wings. Using your Ellipses tool again- create some perfect circles of varying sizes, as many as you'd like but don't go overboard. Make them any color you want. Using your Select Arrow tool, place the circles on one side of the wings- be creative, don't line them up, space them apart vicariously...

When the dots are where you want them, select them all by clicking on each while holding down the "Shift" key. Group the dots by going to Object — Group in the nav bar or by selecting the dots and then key "Option + G" ("Cntrl + G" for PC users).

Copy and paste the group of dots we made, transform the new dots to mirror reflect by choosing Object — Transform — Reflect — Vertical. Align both groups of dots using Vertical Align Top from the Align window. Make sure your dots are place properly on the wings.
How about some antennae? Using your Pen tool make an anchor point, then simply make another anchor point close by- click and hold down - drag to make an arc. Un-select by using the Select Arrow tool and clicking anywhere on the screen. Re-select the arc we just made and place it anywhere on the head making sure it overlaps on the head. Make a second antenna by copying the first one and place it on the other side of the head.
Be sure that the fill color is selected "none" and you have chosen a stroke color. Be creative, select your antennae and use a different brush stroke by choosing a brush under the Brushes window (not to be confused with the Paintbrush tool).

Change up the colors, fix the arcs of your wings by using the Direct Select arrow tool and clicking on an anchor point. You can use this tool on any anchor point of a shape to make custom shapes.

Ta-da! A psychadelic ladybug:

Hopefully in the near future I will have mastered the art of video tutorials, stay tuned to find out!
Constructive feedback is always welcome, be nice, arrogance is not tolerated.

I'm so proud of you! (especially since you lost me in the technical parts, lol).
ReplyDeleteMomma
-ourhometoyours
looks great!
ReplyDelete